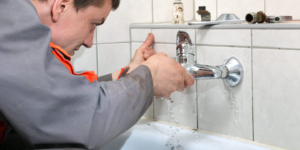
A leaky faucet can be an annoying problem that wastes both water and your money. The constant drip-drip sound not only disturbs your peace but can also cause water bills to rise over time. But don’t worry, fixing a leaky faucet is easier than you think, and you don’t need to call a plumber right away. In this guide, we’ll show you how to fix a leaky faucet with step-by-step instructions, saving you time and money.
Why Do Faucets Leak?
Before we jump into how to fix a leaky faucet, let’s first understand why faucets leak. Most often, the problem arises due to a worn-out part inside the faucet. Here are a few common reasons:
- Worn-out Washer or O-Ring: Over time, washers or O-rings inside the faucet can wear out, which leads to leaks.
- Corroded Valve Seat: The valve seat connects the faucet and the spout, and if it corrodes, it can cause water to leak.
- Damaged Cartridge or Stem: The cartridge or stem controls the water flow, and if it gets damaged, it might cause a leak.
- High Water Pressure: Sometimes, if your home has high water pressure, it can force water out of the faucet, causing it to leak.
Now, let’s take a closer look at how to fix a leaky faucet in a few simple steps.
How to Fix a Leaky Faucet: Step-by-Step Instructions
Turn Off the Water Supply
Before you start working on the faucet, it’s important to turn off the water supply. You’ll usually find the shut-off valves under the sink. Turn the valves clockwise to close them. If you can’t find the valves, you may need to turn off the main water supply to the house.
Plug the Drain
To avoid losing any small parts down the drain, plug the drain with a sink plug or a rag. This step will help you avoid having to search for tiny screws or washers that may fall in while you’re working.
Identify the Type of Faucet
Faucets generally come in different types:
compression, cartridge, ball, and disc faucets. The method for fixing each type varies slightly, so it’s important to know what kind of faucet you have.
- Compression Faucets: These have two handles for hot and cold water.
- Cartridge Faucets: Typically single-handle faucets with a cartridge inside.
- Ball Faucets: Often used in kitchen faucets with a single lever for controlling water flow.
- Disc Faucets: Modern faucets with a single lever and a ceramic disk.
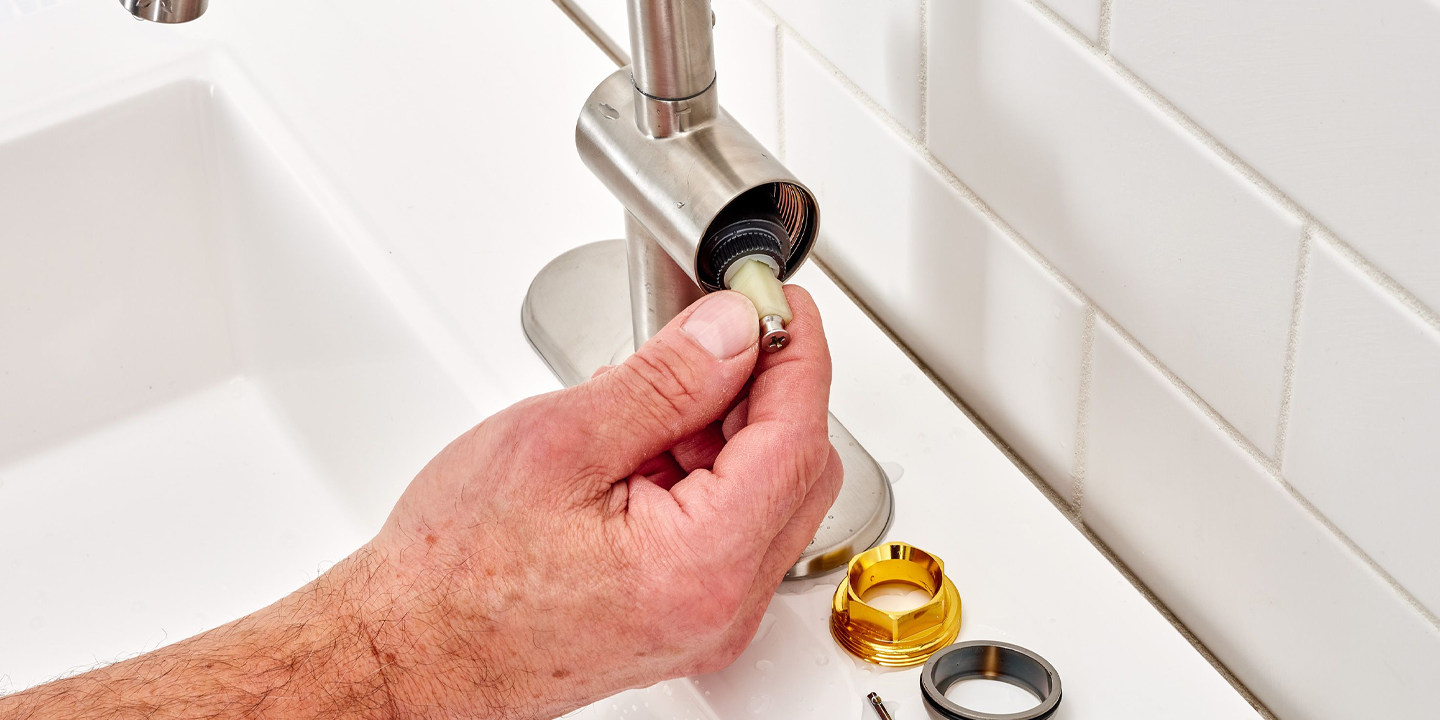
Disassemble the Faucet
Once you’ve identified the type of faucet, you can begin disassembling it.
- For Compression Faucets: Use a wrench to remove the handle. Then, unscrew the packing nut to access the washer and stem.
- For Cartridge Faucets: Use a screwdriver to remove the handle, and then pull out the cartridge.
- For Ball Faucets: You’ll need a special tool to remove the ball mechanism.
- For Disc Faucets: Unscrew the handle and lift out the cartridge or ceramic disc.
Tip: Take a photo of each step as you disassemble the faucet. This will help you reassemble it later.
Inspect the Parts
Check the parts inside the faucet, especially the washer, O-ring, cartridge, or stem. If they appear worn out or damaged, they will need to be replaced. You can take the damaged parts to a hardware store to find the correct replacements.
- Washer or O-Ring: These are often the main culprits for leaks.
- Cartridge or Stem: If these are cracked or corroded, you’ll need to replace them.
Install the New Parts
Once you have the replacement parts, install them carefully, making sure they fit snugly. For washers, make sure they sit properly in place. For cartridges or stems, ensure they’re inserted in the correct orientation.
Reassemble the Faucet
Now that the new parts are in place, it’s time to reassemble the faucet. Follow the same steps you took when disassembling it, but in reverse. Tighten everything securely, but don’t overtighten, as this could cause damage.
Turn On the Water Supply
Once the faucet is reassembled, it’s time to turn the water supply back on. Slowly open the faucet and check for leaks. If the leak is gone, you’ve successfully fixed your faucet!
Tips to Prevent Future Faucet Leaks
- Check for High Water Pressure: If your water pressure is too high, it can strain your faucet. Consider installing a pressure regulator to avoid future leaks.
- Regular Maintenance: Periodically inspect your faucets for signs of wear and tear, and replace parts as needed.
- Use Plumbing Tape: When reassembling your faucet, apply a small amount of plumbing tape to the threads to ensure a tighter seal.
Frequently Asked Questions (FAQ)
Q: How do I know if my faucet needs a new washer?
If your faucet is leaking from the spout or base, there’s a good chance that the washer is worn out. If the leak persists after replacing the washer, check for other issues like a corroded valve seat.
Q: Can I fix a leaky faucet without professional help?
Yes! Most leaky faucet issues can be fixed with a few simple tools and the right replacement parts. However, if you’re not comfortable with plumbing repairs, you may want to call a professional.
Q: What should I do if my faucet is still leaking after replacing the parts?
If your faucet continues to leak after replacing the washer, cartridge, or stem, it could be due to a more serious issue like a corroded valve seat. In this case, it’s best to consult a plumber.
Q: How can I stop my faucet from dripping?
In addition to replacing faulty parts, ensure that the faucet is assembled tightly, and check the water pressure. Sometimes high water pressure can cause dripping, so adjusting it may help.
Q: Can a leaky faucet cause high water bills?
Yes! Even a small leak can waste a significant amount of water over time, which leads to higher water bills. Fixing a leaky faucet promptly will save you money in the long run.
Conclusion
Fixing a leaky faucet doesn’t have to be a stressful or expensive task. With the right tools and replacement parts, you can easily repair your faucet and stop that annoying drip. Remember, even small leaks can waste a lot of water and money, so it’s worth taking the time to fix them.
If you follow these simple steps and use the right parts, you’ll have your faucet working like new in no time. If you’re ever in doubt or the problem persists, don’t hesitate to contact a professional plumber.
The creator of HowToMake0.com brings well-researched knowledge and practical creativity together, offering clear, step-by-step ideas and guides to turn concepts into real projects.